(Click on any image below to view larger size.)
- This is a 1956 Porsche Speedster owned by the same person since he raced it in the late 60’s, early 70’s.
- He stripped the car completely, had it chemically stripped of paint and e-coated before it came to me.
- The semi-gloss black makes it very clear as to the straightness of the body.
- There was quite a bit to be done.
- As you can see, there was no floor and both longitudinals were gone.
- A number of braces were required to make it stable enough to put it on a rotisserie.
- The next few pictures show the longitudinals being rebuilt.
- Here the lower edge of the front bulkhead is replaced. The floor then attaches to it.
- The next several pictures show how a damaged area is replaced.
- All body patches are butt welded together.
- They are then hammer and dollied into final shape as needed.
- Here is a prime example of how well some replacement parts fit when received. Most fit better but virtually all of them need fitting.
- The metal work is coming along.
- A nice straight body line all the way down.
- While the door fit is very good, there is still hand work that needs to be done on the rear quarter.
- This repair will take a bit more work. The headlight bucket must fit in tight and even.
- First the round contour is created and fit. Some of the old metal is still there for reference.
- The rest of the damaged metal is removed and a new piece is made.
- The next several pictures show how each piece must be made to fit. Tacked in place until they are all ready for complete welding.
- The passenger side door was not original. That meant the door opening had to be made to fit the door.
- They were made by hand when new. To get the same caliber of fit, they have to be hand made again.
- Everything must be test fit before any body and paint work can begin.
- Here the side Speedster spear holes are laid out.
- Most people will not show any body filler being used. These pictures show how little is actually used when the panels are done.
- Again, a minimum of filler is used to round out the contour.
- Epoxy and high build primer are used to fill small imperfections that will be removed during block sanding.
- A guide coat is applied to show the hi and low spots as the body is being blocked. This is where the body becomes very straight.
- A rare 80 liter gas tank is fitted.
- Body lines are checked again during the blocking stage.
- Finish details.
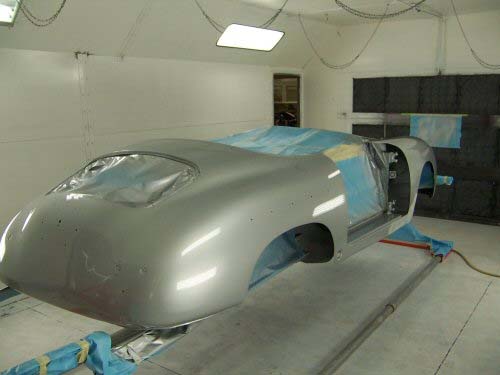
- The body in a base/clearcoat system.
- The body is masked off for undercoating.
- The clearcoat has been completely sanded down before polishing.
- The wheel wells are masked to keep them clean while polishing.
- It is ready to go back to the customer.


